Videos: How to Create and Customize
Last updated: April 14, 2026
Video is a unique feature that allows you to create one personalized video that dynamically adapts to thousands of prospects — making your outreach feel tailored and authentic.
By incorporating a prospect’s Social profile directly into the video, Video helps build trust and connection with your audience.
Note: Video is only available for campaigns that include Social Outreach. It is not available for Email-only campaigns.
Ways to Use Video
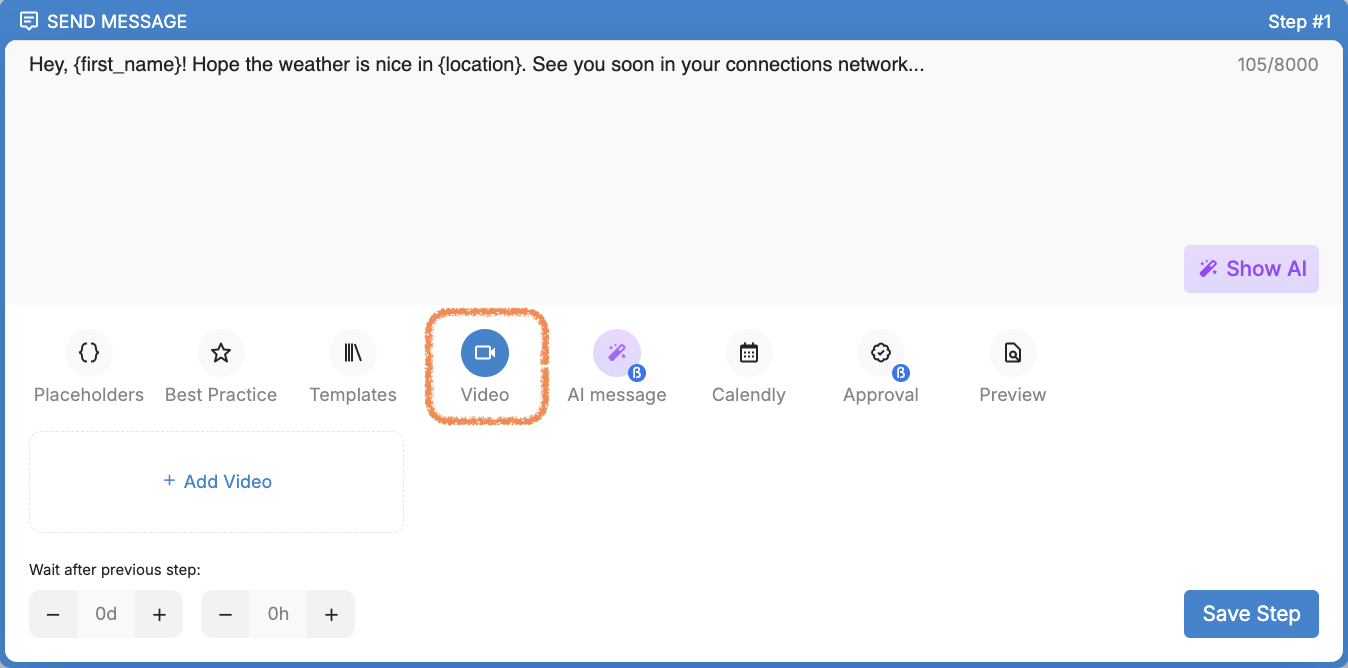
Videos can be added directly within campaign steps that contain text, including:
Send Connection Request
Send Message
Send Email
Send InMail
To get started:
Navigate to the Resources tab.
Choose My Videos at the top.
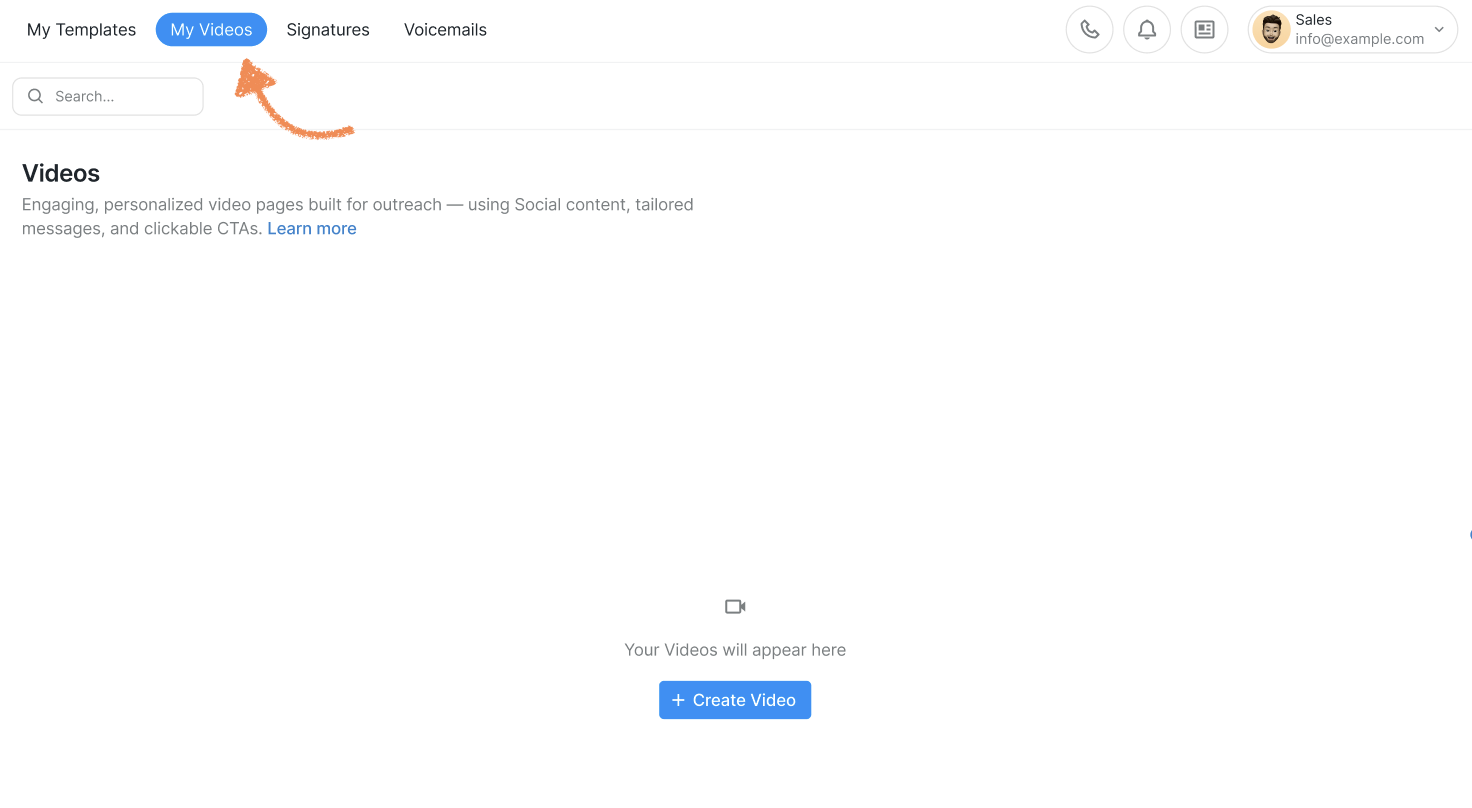
Click + Create Video.
📌 Tip: Before recording, make sure your camera and microphone are working and that access permissions are enabled.
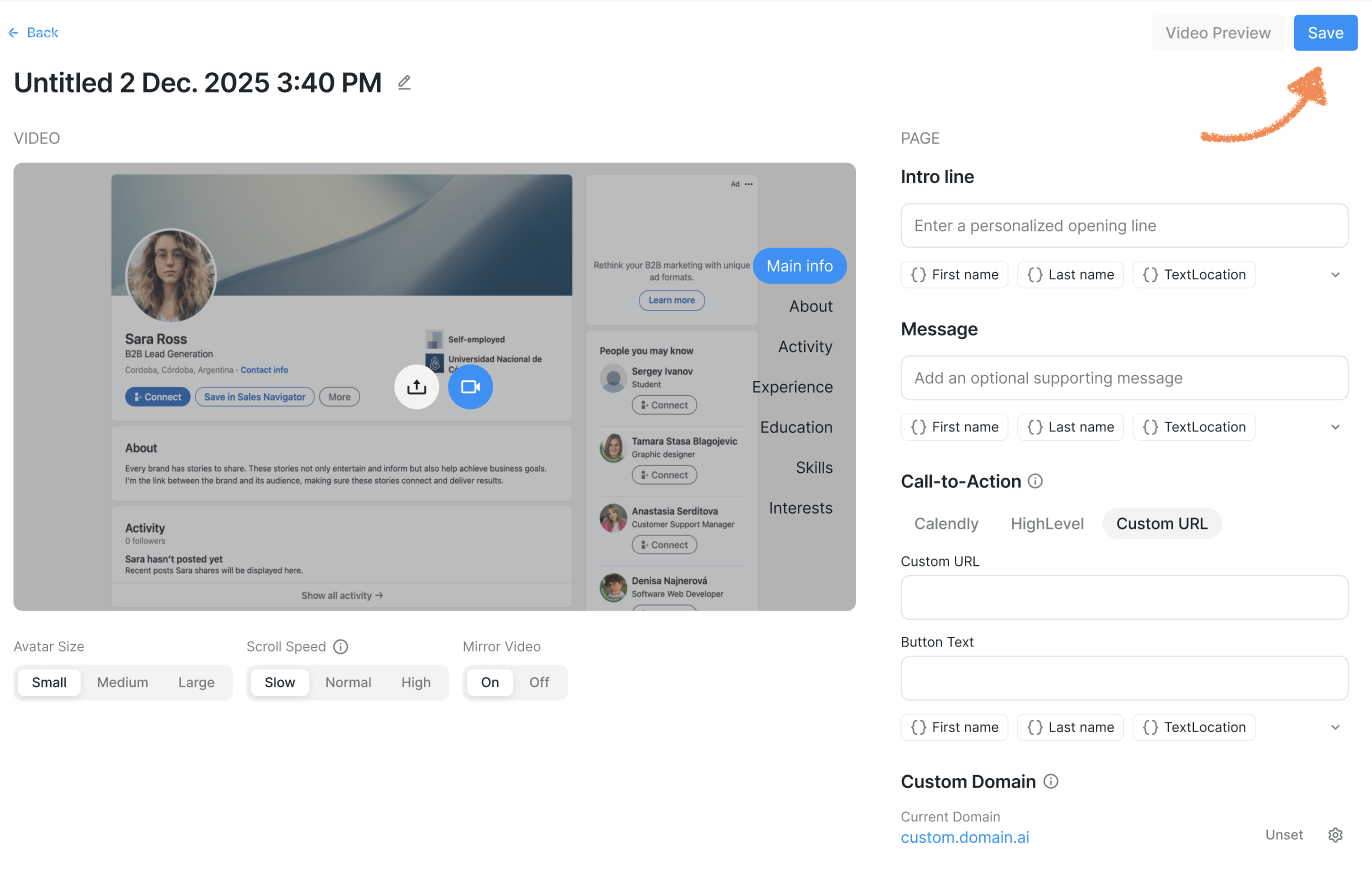
Look through the quick onboarding guide. Next, you'll be prompted to enter the information that will accompany your video:
Intro line – an opening line above your video shown to your prospect.
Message – optional supporting text.
You can use placeholders in the into line and message, which automatically pull in personalized data from each prospect’s profile.
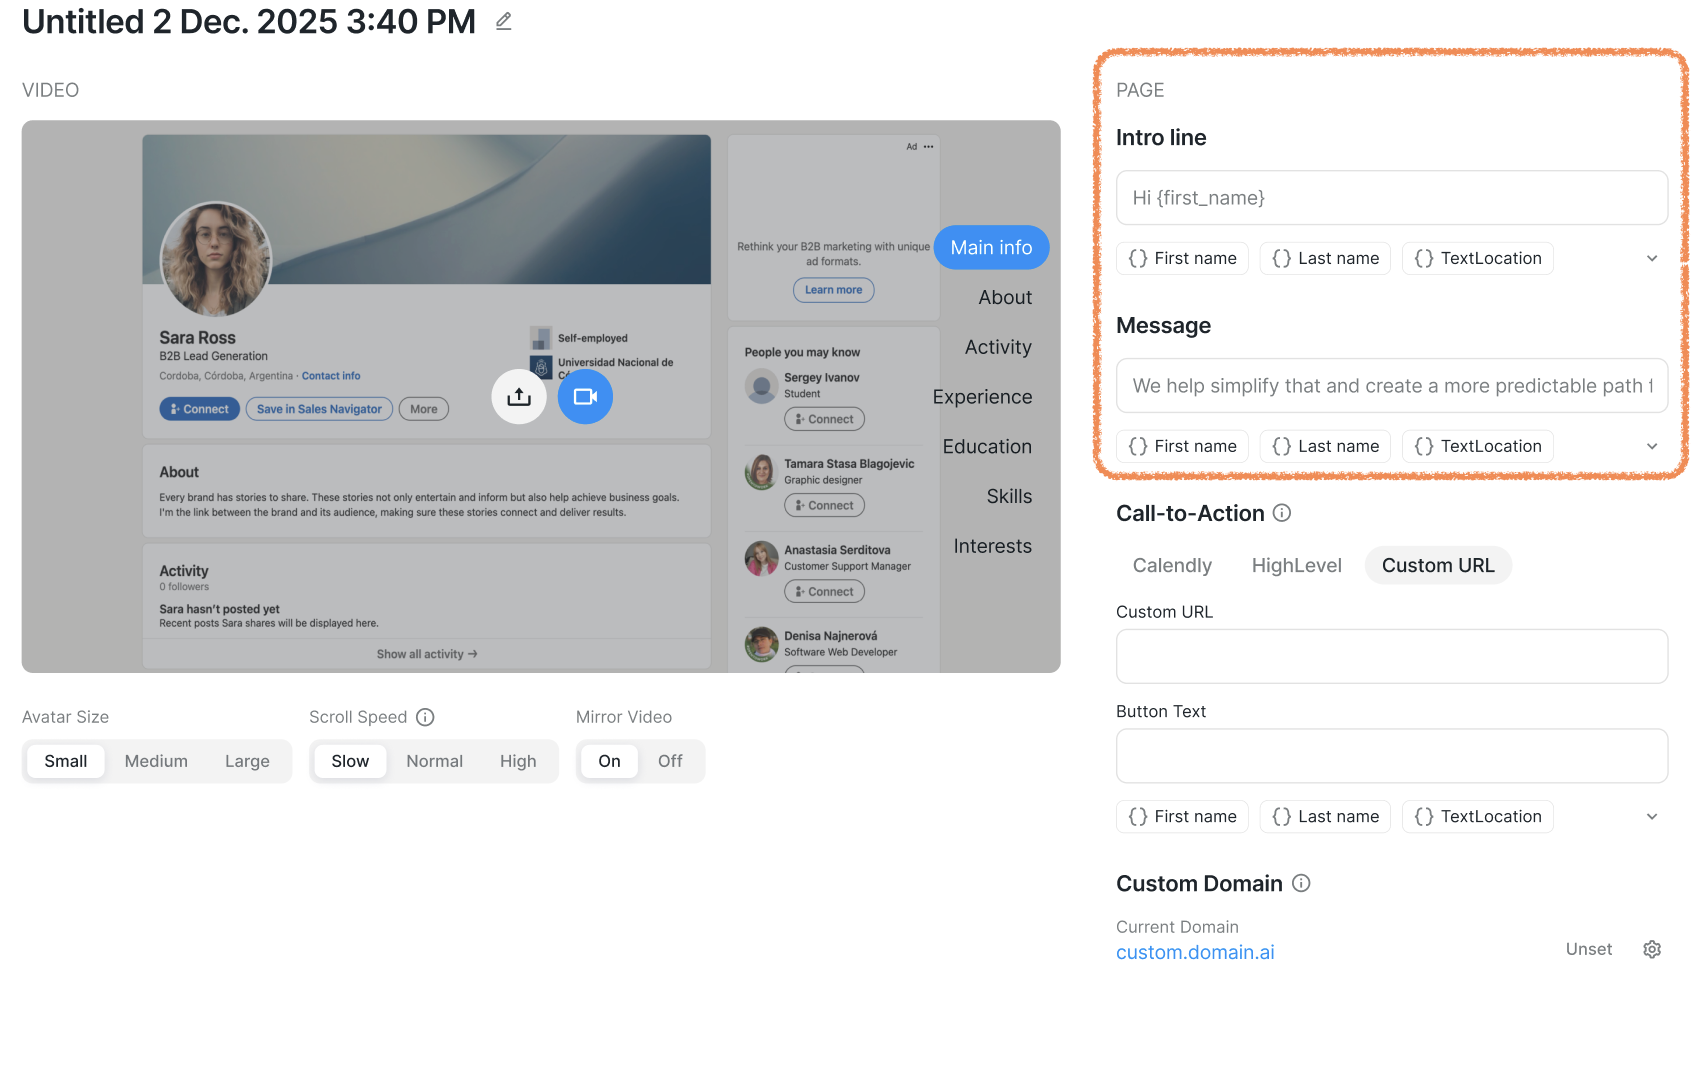
To the left, you will find the most important section where the video is recorded. Before starting, check the settings below the video:

With these settings, you can:
Adjust your avatar size (which will appear in the bottom-left once the camera access in grated).
Set the scroll speed
Choose whether to mirror your image.
Recording Your Video
Once you're ready, click Start Recording.
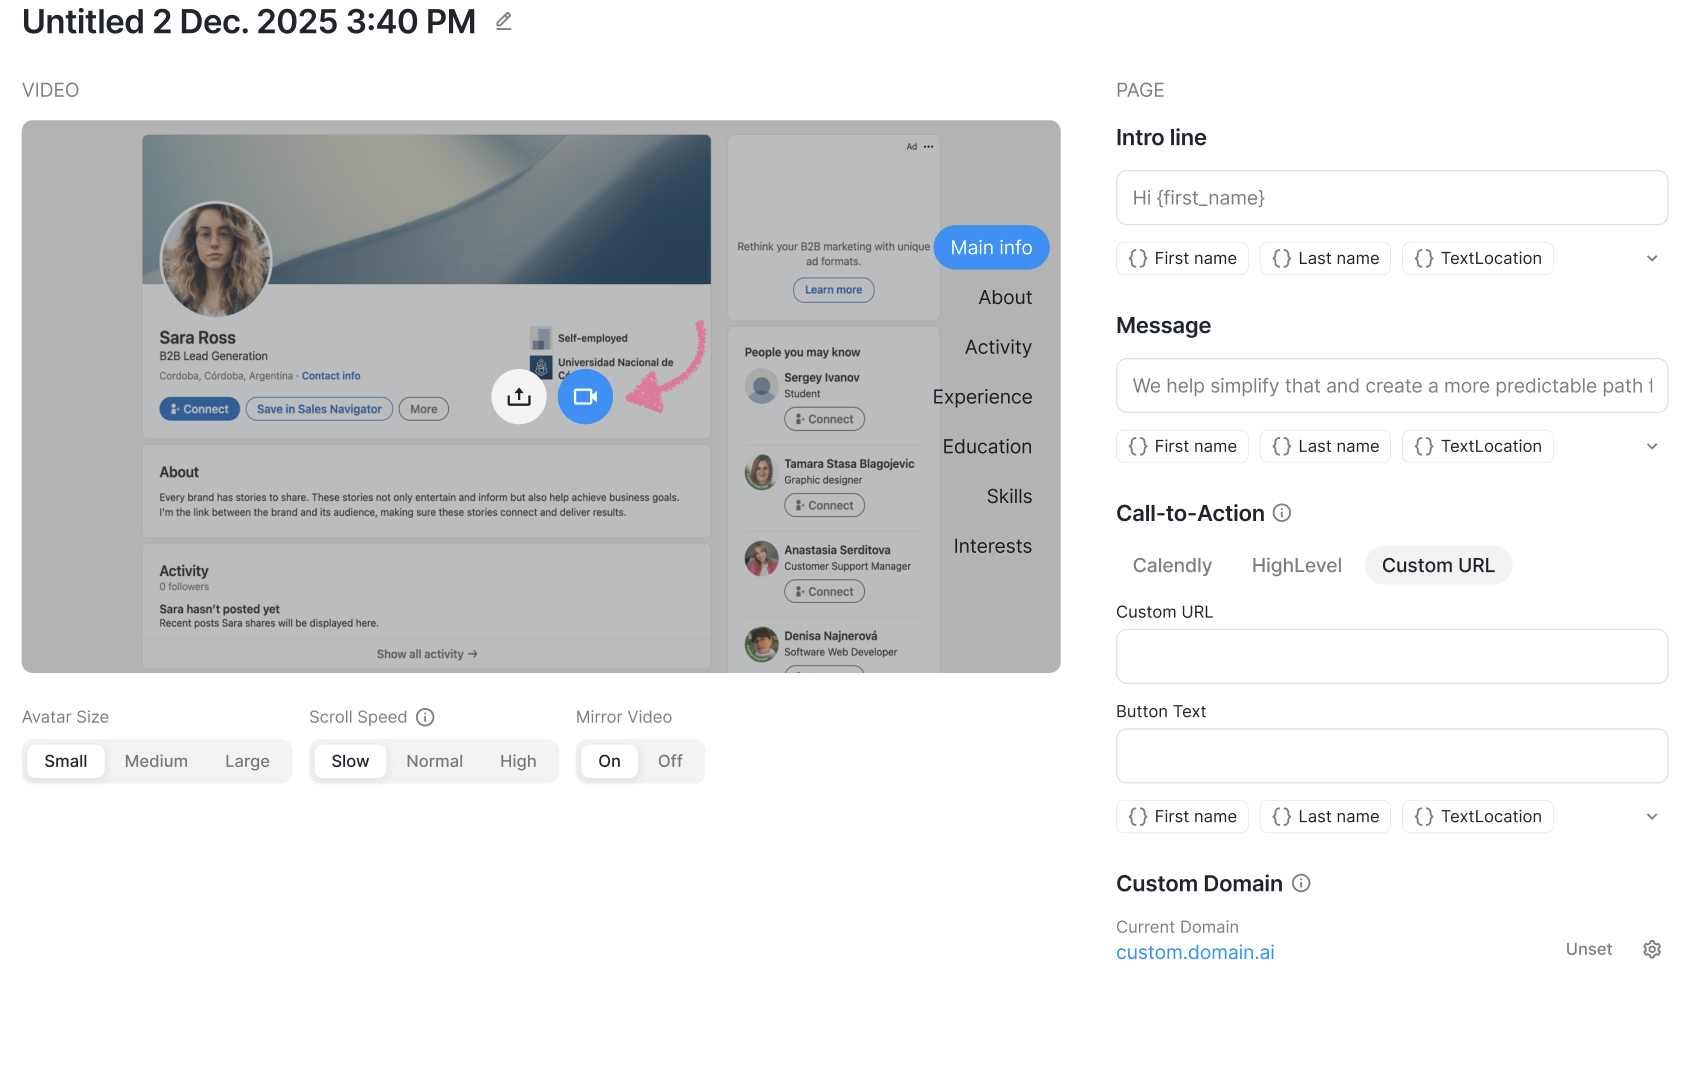
As you speak, highlight sections of the prospect’s Social profile that relate to your message (bio, experience, interests, etc.) while simultaneously clicking through this panel:

This keeps your narration visually aligned with what’s on screen.
Add a Call-to-Action (CTA):
On the right, you’ll find the option to:
Add a CTA message and link
If you're using Calendly or HighLevel, an embedded calendar will appear on the landing page.
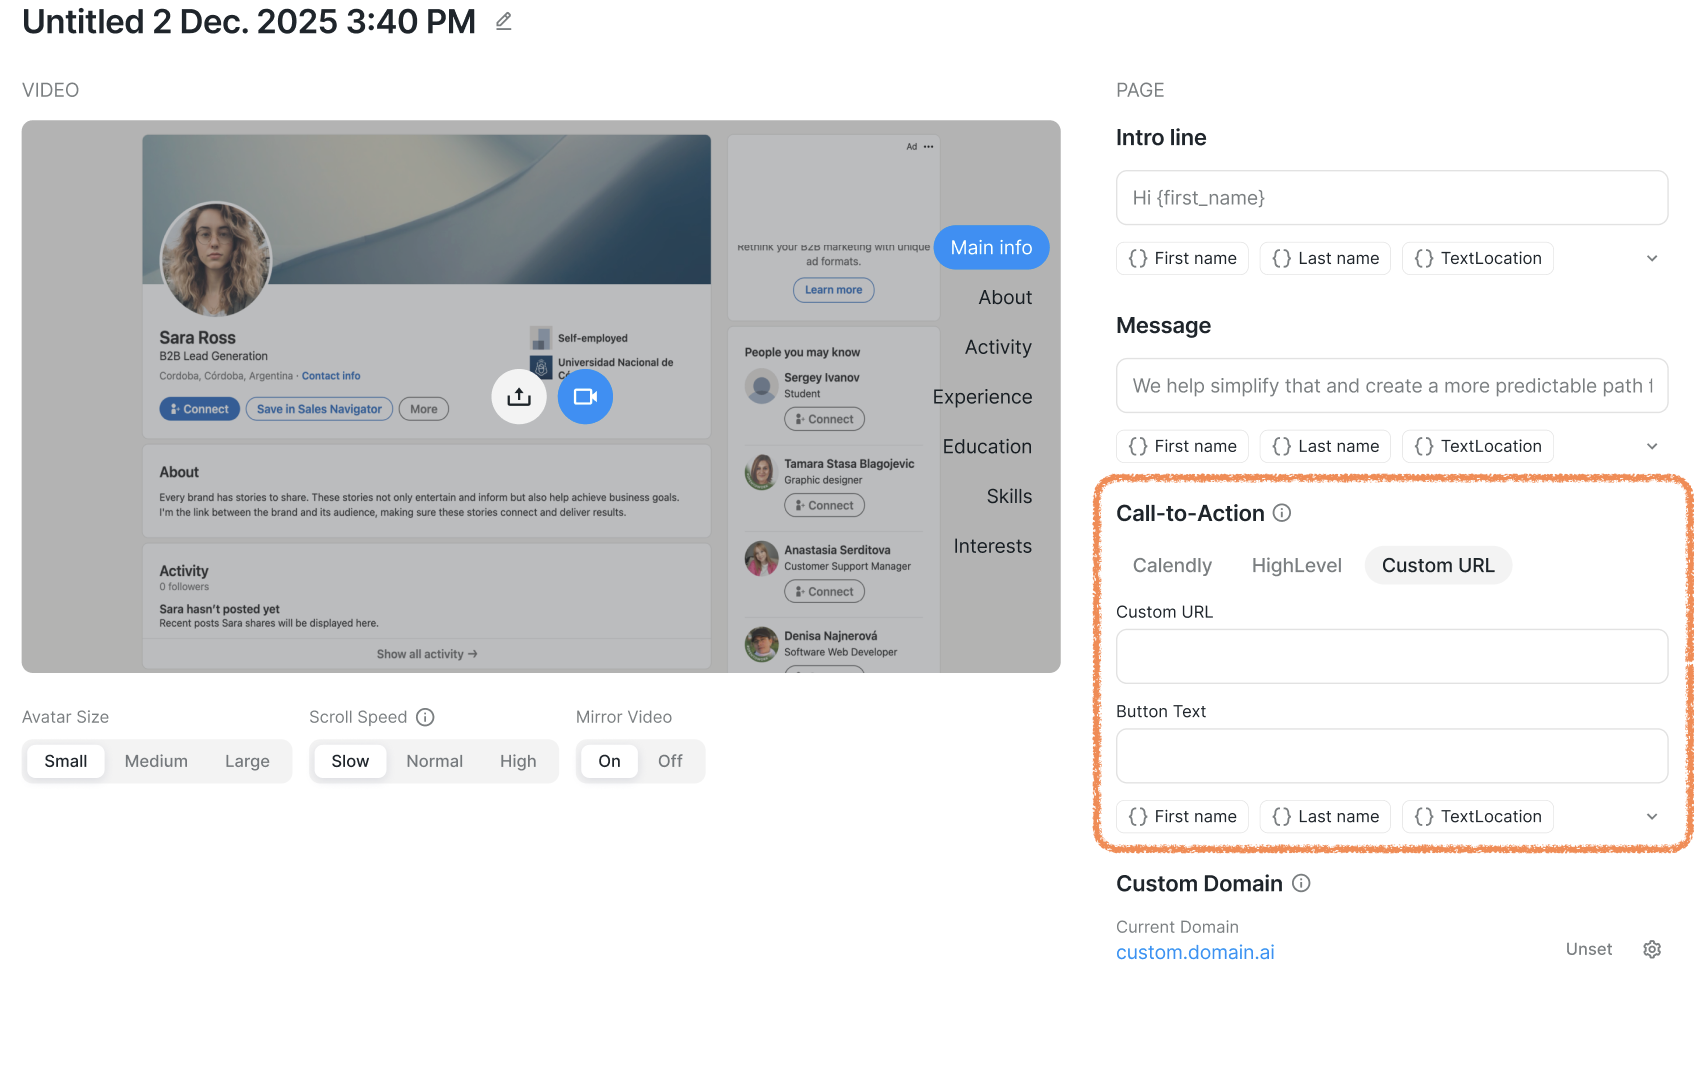
For other tools (set up via Custom URL), the CTA will appear as a clickable button.
You can also assign a custom domain to host the landing page where your video will be displayed.
You can edit the name of the video (only shown to you on the platform) for quick and easy navigation in your video library. Click the small pencil icon next to the default name to edit it:

Once the video is complete, click Save in the top-right corner. Your video is now ready to be included in your campaign.
This interactive, scalable approach allows a single video to feel uniquely tailored to each prospect by dynamically pulling in their profile data.
Accessing Videos from the Resources Tab
You can view, manage, or create Videos from the Resources tab:
Go to Resources in the left sidebar.
Click My Videos at the top of the page.
From here, you can:
Create a new recording (same process as above)
Search your library
Preview existing videos by clicking Show
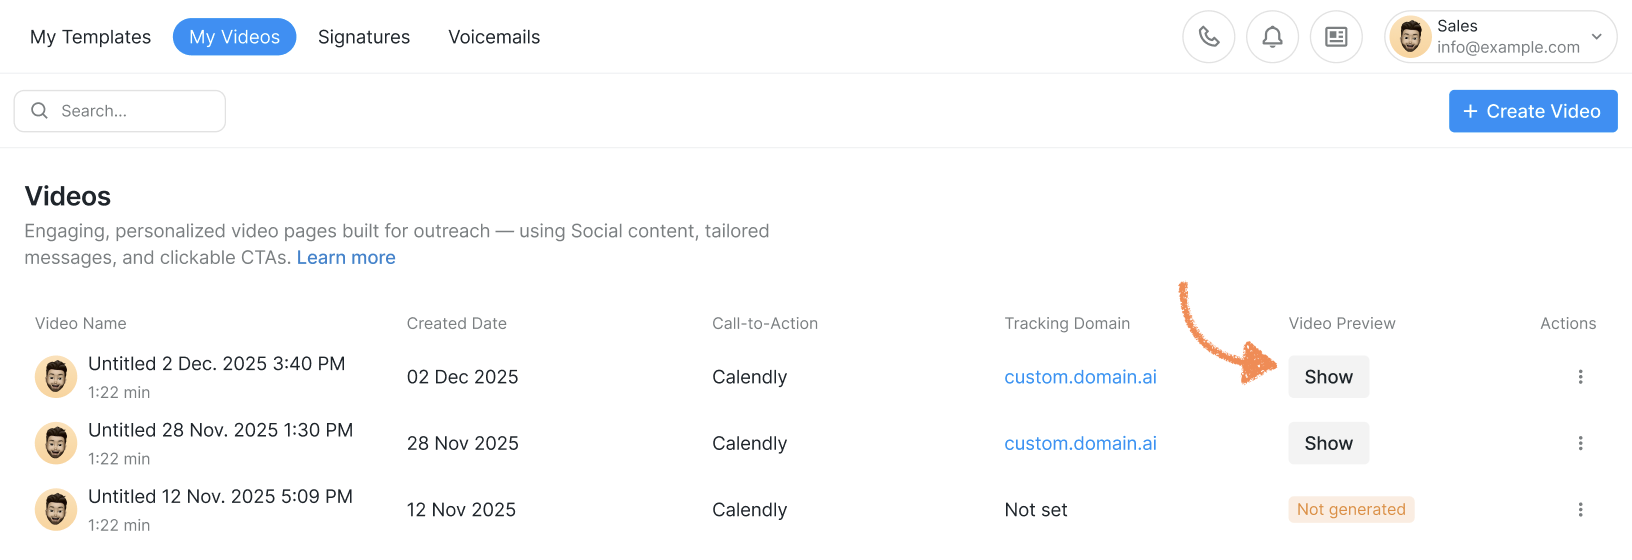
Edit any of your saved recordings
How to Upload a Prerecorded Video
Prefer to use a video you’ve already created?
Click Upload instead of Start Recording
Select your file from your device

This is great for teams using branded intros, pre-made demos, or externally edited content.
How to use Video for Posts
Posts provide an effective way to engage relevant prospects, especially those who have shown interest in your product, service, or industry.
When creating a Video for these prospects, focus on three key elements:
Mention the company or author of the post.
Show that you understand the content of their post.
Explain why you targeted them based on that specific post.
If you have any questions regarding Video, please feel free to contact our Customer Support team.