How to Set a Custom Sender Name for Your Mailbox
Last updated: April 14, 2026
When it comes to email communication, your sender name (alongside the subject line) is often the first thing a recipient sees when your message lands in their inbox. In most cases, this name is pulled directly from your email provider’s account settings. However, sometimes your name might not appear as intended, and the recipient will simply see your full email address instead.

We know that’s far from ideal. That’s why you can now set a custom sender name for any mailbox you've connected to our platform.
A clear, professional sender name not only builds trust, but also improves email deliverability and open rates.
❗Note: Setting custom sender names for Outlook mailboxes isn't available.
How to Set a Custom Sender Name
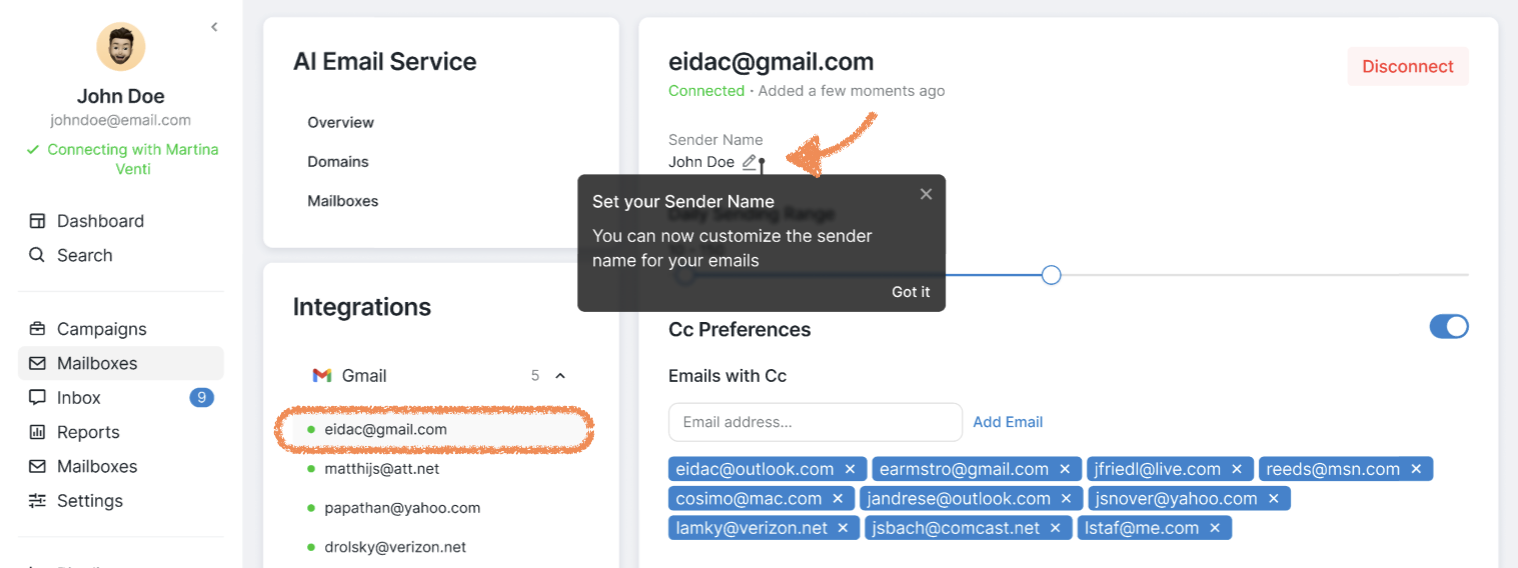
Navigate to the Mailboxes tab.
Select the mailbox you want to update from your list of connected accounts.
Under your email address, locate the Sender Name section. By default, this will reflect your connected Social Account’s name.
Click the pencil icon to edit it.
You’ll now see two options:
Use the name already set in your email provider (e.g., Google).
Enter a custom sender name (e.g., John Smith).
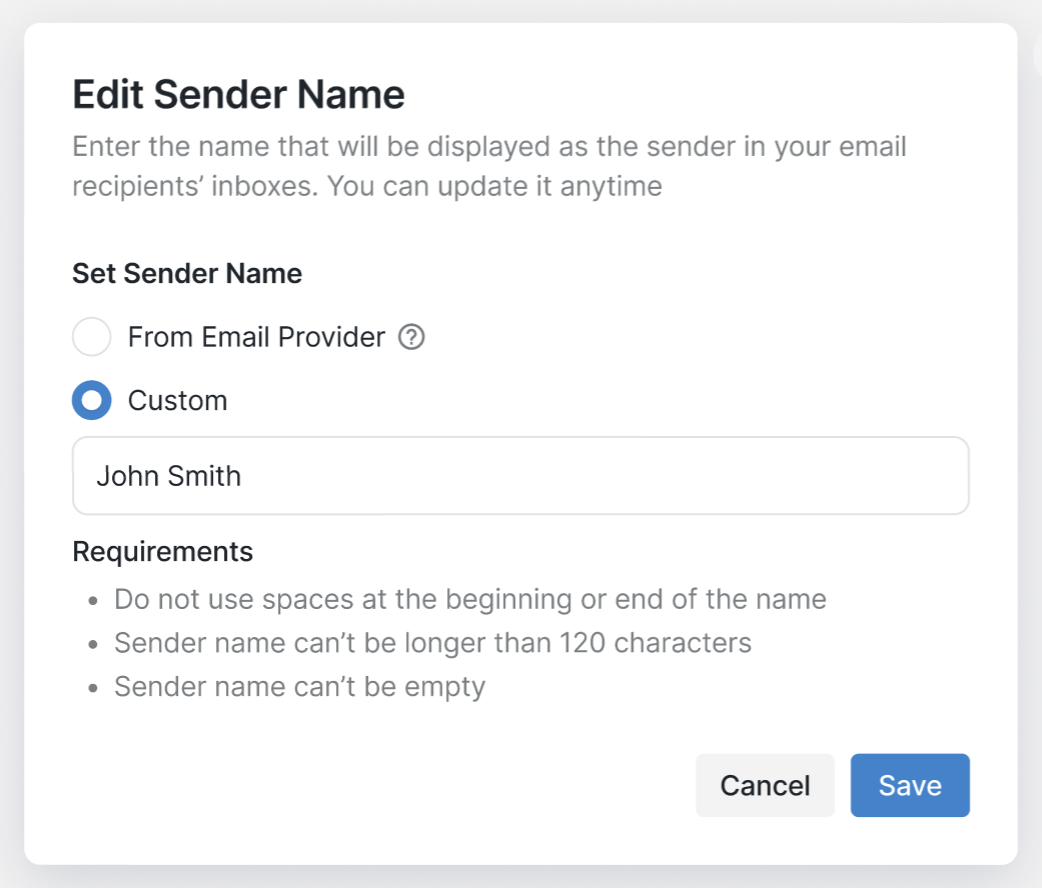
💡 If you choose to enter a custom name, be sure to follow our formatting guidelines. You’ll find more tips on best practices in this article.
Once you’ve entered your name, click Save to apply the changes. You’ll receive a confirmation once your update is successful.
This feature gives you full control over how your name appears in recipients’ inboxes. You can update it anytime — and if needed, revert back to the name set in your email provider.
Have questions? Don’t hesitate to reach out to our Customer Support team.