How to Upload a CSV File to Your Campaign
Last updated: April 10, 2026
One of the available search options is uploading a CSV file — perfect for when you already have a list of prospects and want to connect with them through your campaign.
If you’ve exported a list from your preferred database (or created one from scratch), you can easily upload it and turn it into a campaign. Here's how to do it, step by step:
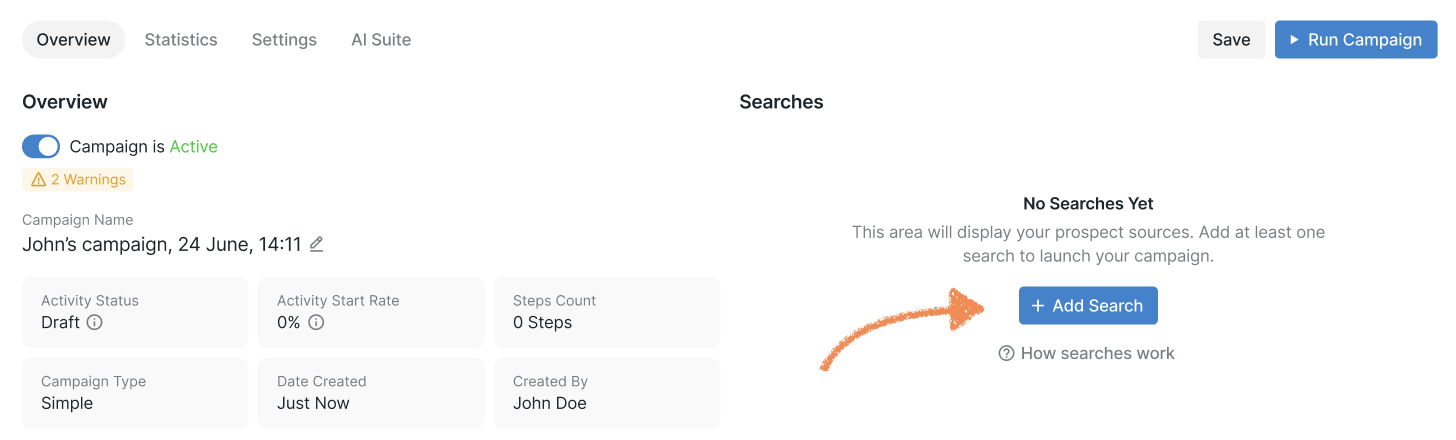
Start by creating your campaign. Once you're on the setup screen, click the Add Search button.
2. From the list of available search types, choose CSV File.
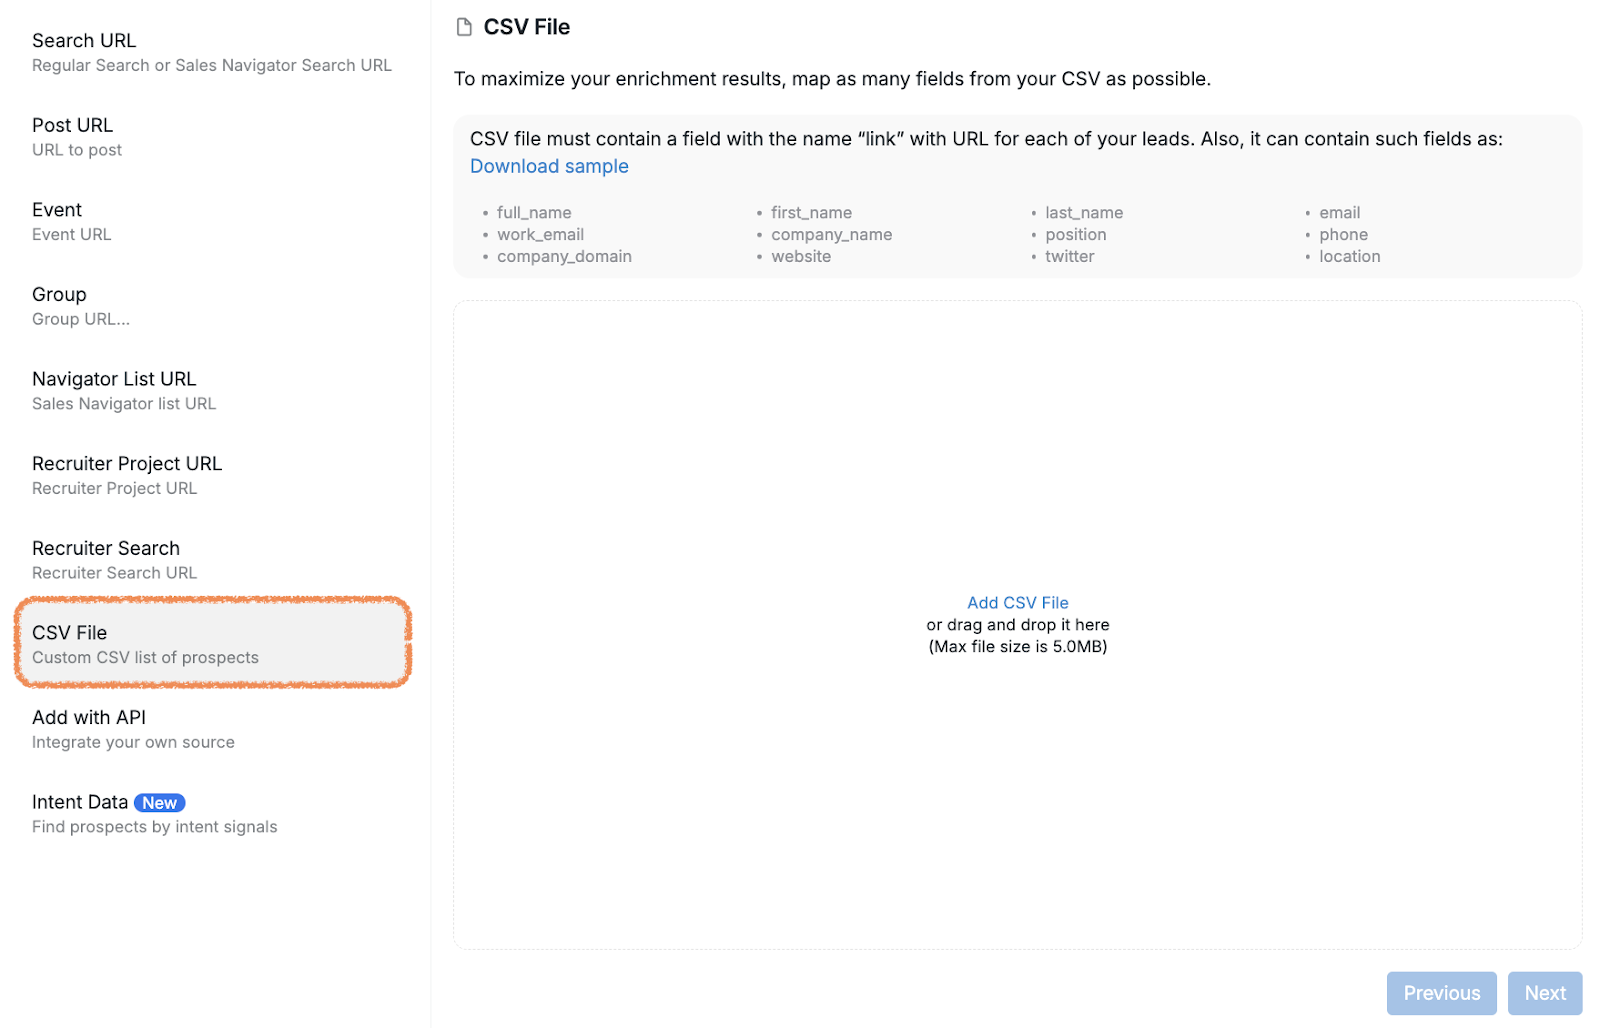
3. Then, click Add CSV File in the center of the screen.
4. After uploading your file, you’ll be prompted to map each field to match the campaign’s data requirements.
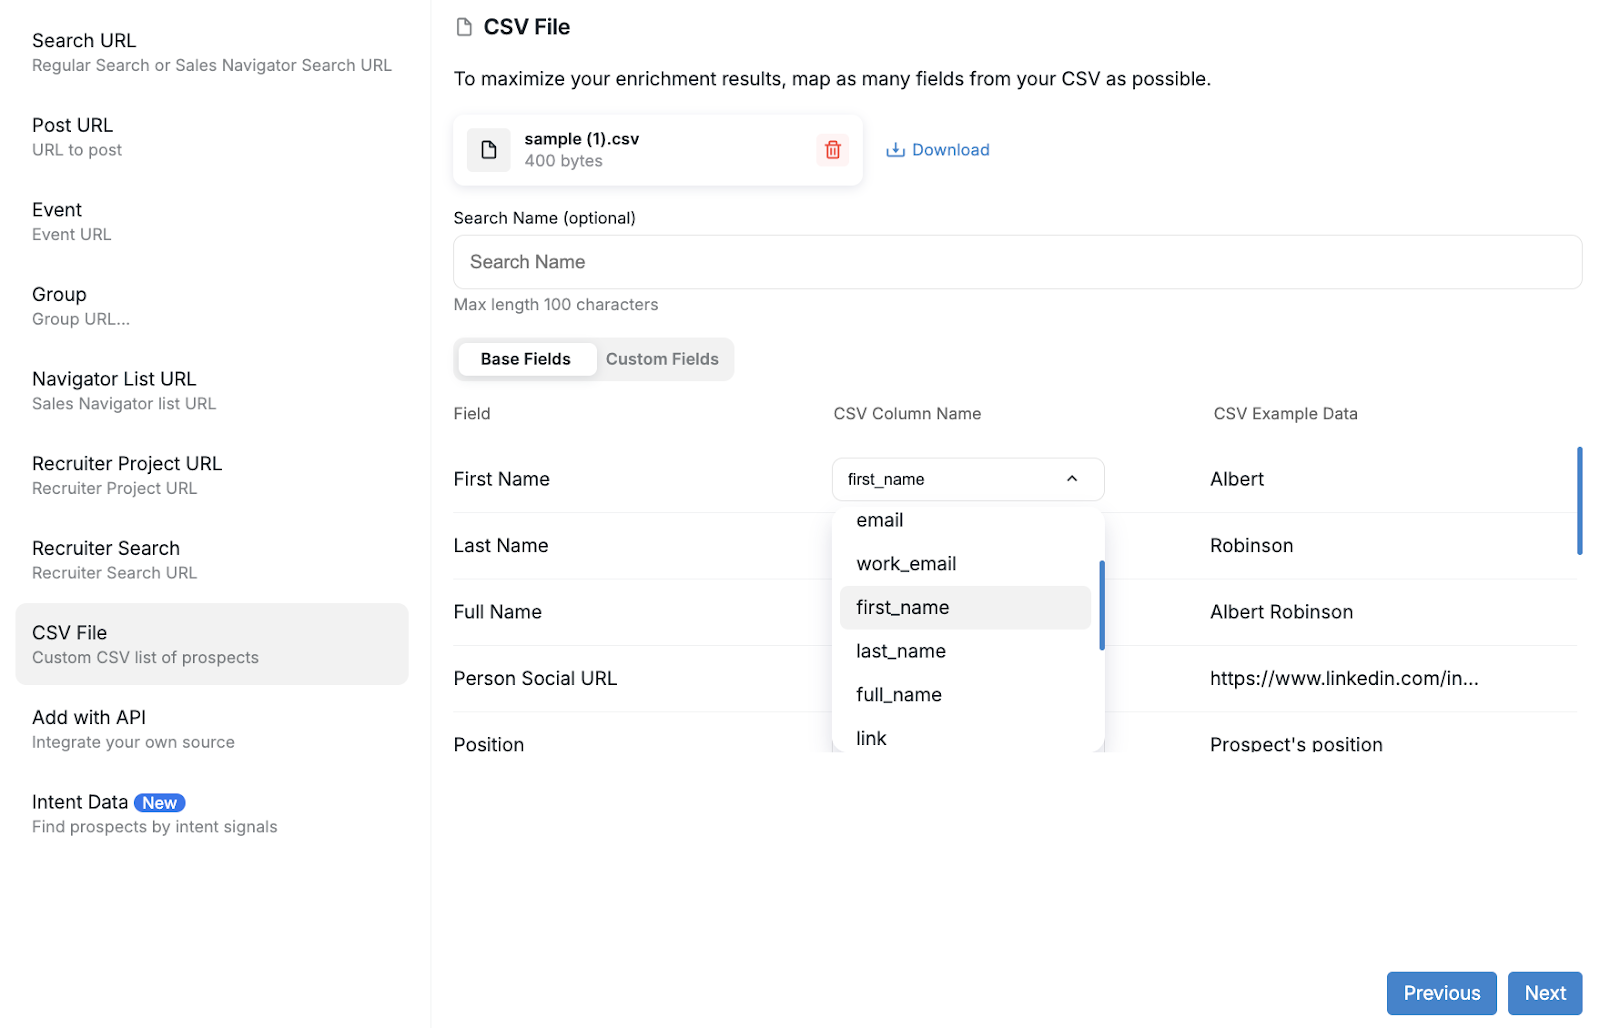
This step ensures the information in your file (like name, email, phone number, etc.) is accurately read by our platform. Take your time with this — mapping your fields correctly is key to a smooth campaign launch.

5. Once you’ve finished mapping and named your file, click Save to add the search to your campaign.
A Quick Note on Troubleshooting
If your prospects aren’t showing up in the campaign as expected, check out this helpful article for the most common issues (all reasons except #8 apply to CSV uploads): Common Reasons That Prevent Prospects from Joining Your Campaign
If you have any questions or need help, our Customer Support team is always happy to help — reach out anytime!